The Coinbase Prime Web3 Wallet is integrated into Coinbase Prime so you continue to have institutional-grade controls and access to our advanced trading, financing, and qualified custody in addition to a new web3 wallet.
These institutional grade features to safeguard your assets in the web3 wallet include:
State-of-the-art MPC technology to remove single points of failure to safeguard your assets. Wallet keys are born split (2 of 2) and shared between Coinbase and mobile devices controlled by end users. Keys are never exposed or assembled during generation or signing.
Device recovery mechanisms to reduce the risk of losing access to this non-custodial wallet.
Coinbase Prime’s institutional-grade transaction security.
Customizable transaction policy based on your institutions’ needs.
We have designed our wallet so that you have the flexibility and control to structure operational security measures as you see fit.
Expand the sections below to learn how you can secure your Web3 Wallet.
Device security
Do not Uninstall or Delete the Prime Mobile App. This will delete the user shard on Mobile.
Make sure device management solutions like MDM will not uninstall the Prime Mobile app.
Only use the Prime Mobile App from the official Apple AppStore. Use the link from your Prime account.
Only use the Prime Wallet Extension from the official Chrome Store. Use the link from your Prime account.
Do not use a jailbroken iOS device with your Web3 Wallet.
Keep your iOS device up to date with Apple Security updates.
Keep your iOS device clean of unwanted or untrusted apps.
Maintain strong and complex passwords for your iCloud account and add 2FA
Use the latest version of the Prime mobile app and of the Web extension.
Use the latest version of the Web browser used to access Prime.
Do not reset the phone or enable the iPhone auto erase option after 10 failed passcode attempts. This will delete the user shard on mobile. This is particularly important for a portfolio with a single signer. If you must reset or erase the phone, add multiple signers in the portfolio or have a valid device recovery phrase.
Lost devices must be remotely wiped using Apple iCloud.
Operational procedures
Create a recovery backup and save your recovery passphrase in multiple secure locations for your organization.
The recovery passphrase is not your private key, it is only an encryption key to your recovery backup in case you lose access to all your devices.
Do not share recovery passphrases with anyone outside your organization.
Designate multiple web3 signers when possible, we recommend at least 3 signers for redundancy if possible.
Limit user permissions in Prime to the minimum required scope.
Only interact with trusted dapps.
Regularly review user and dapp permissions and revoke unneeded privileges.
Implement controls using Prime’s address book and policy engine.
Check the Settings tab within the Prime Approvals Mobile app to confirm that your key material is stored on your current mobile device.

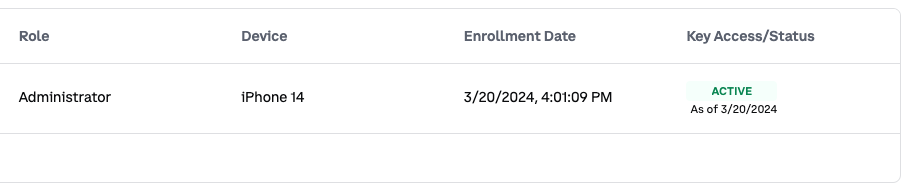
View the Web3 tab within the Settings page on the Prime platform to see relevant key and device information underneath Web3 Signers
The Coinbase Prime Web3 Wallets leverage MPC technology to remove a single point of failure on one private key and each web3 signer’s mobile device holds cryptographic material protected by biometrics. If a device is lost, it is recommended to remotely wipe the device using Apple iCloud tools, which will remove all data on the device.
Losing access to a device poses a risk of losing access to your wallet when using the Prime Web3 Wallet. This can occur if the mobile device is lost, broken or the app is deleted. Ensuring redundancy for your wallets is essential, and there are two ways to do this:
Designate multiple Web3 Signers in each portfolio
Adding more than one signer to a portfolio provides better flexibility to sign transactions once consensus is reached. It also provides additional redundancy in the event a Web3 Signers’ phone becomes ineffective, as an existing Web3 Signer can reprovision the compromised signer’s access. It is recommended to have at least three signers on a given portfolio if possible.
Learn how to add a new Web3 Signer here.
2. Device recovery: Coinbase assisted backup.
During onboarding you will create a recovery back up with its associated recovery passphrase. In the event all Web3 Signers lose access to their device, you have the ability to recover your key on a mobile device using the recovery passphrase that you control in the form of a 12 word passphrase (this is NOT your private key - it is only an encryption key to encrypt your recovery back up). Once the backup has been generated, the passphrase should be stored in a safe place. If the passphrase is compromised or lost, as long as you still have access to your key shard the passphrase can be regenerated and the previous passphrase will be invalid.
To regain access to the device key shard, you will need to access Prime (username, password, Yubikey), reach consensus approval and use the recovery passphrase. See more details here.
There are only three areas where the device recovery passphrase will be required.
At Wallet Creation: Saving and confirmation of the recovery passphrase will be required.
During Device Recovery: In the event of loss of access to all provisioned devices, you will be required to use your recovery passphrase to re-generate your private key shard
If you want to replace your recovery passphrase: Saving and confirmation of the recovery passphrase will be required.
Lets run through some examples of our recovery options and risk scenarios:
Web3 Wallet access example: | At least 1 signer has access to shard | At least 1 user has access to recovery passphrase | Recovery Method to use |
Individual Web3 Signer lost access to key shard Ex. Signer deletes the Prime Approvals app or lost device | True | True | ✅ Existing signer reprovisions user access |
Individual Web3 Signer lost access to key shard Ex. Signer deletes the Prime Approvals app or lost device | True | False | ✅ Existing signer reprovisions user access |
All signers have lost access to their devices Ex. Company wide swipe of mobile devices | False | True | ✅Recover key with recovery passphrase |
Recovery passphrase lost Ex. File storing recovery passphrase deleted | True | False | ✅Replace recovery passphrase but requires at least one web3 signer with access to the key shard |
All signers and access to their shard passphrase lost Ex. Account has only 1 signer who has left the company and that individual was the only person with the recovery passphrase saved on their mobile device | False | False | ❌No recovery options available and wallet access permanently lost. |
Consensus provides a checks and balance system on Coinbase Prime. Coinbase Prime allows you to set custom controls for web3 transactions and message signing. If web3 consensus settings are not defined, the standard consensus settings on the portfolio will be applied.
Learn how to change your web3 consensus here.
Address Book
The Web3 Wallets have dedicated address books which allow users to store and manage trusted addresses. They provide a convenient and secure way to send cryptocurrencies to known and trusted addresses or to interact with dapps/smart contracts you trust.
These leverage the existing institutional grade security controls, with enhancements to manage web3 specific concerns, including:
Manage addresses: Add addresses for any supported network and assign address names to quickly and easily send to the correct address.
Custom Configuration: Create multiple address books for a portfolio and specify the network(s) for which this address is whitelisted (ex. Base only or all networks).
Integration with Web3 Policy Engine: Assign custom web3 transaction policies to an address book.
Learn how to manage your address book here.
Destination Protection
Destination protection limits web3 wallets to exclusively interact with destinations included in the Web3 Trusted Address Book. This setting is enabled by default and can be turned off, though this is not recommended.
Discover Web3 Policies, a solution for controlling your web3 transactions based on rules and conditions. It supports:
Precise Outcomes: Customize rules to block or require approvals for web3 transactions based on source, destination, and initiator details.
Integration with Web3 Address Book: Seamlessly manage policy conditions with integrated source and destination fields from your institutional address book.
Rule Priority: Define the order in which rules are evaluated by adjusting their priority. Rules are evaluated in sequence, and when the conditions of a rule are met by a web3 transaction, that rule takes effect. If no conditions are satisfied, the default policy is applied.
Default Policy Control: Configure the default policy through the UI to handle unaddressed scenarios according to your required controls.
Learn how to manage your web3 policies here.
When you interact with a dapp, there are two actions you can take which grant the dapp permissions for your wallet.
Connect your Wallet: The permissions requested by the dapp are listed when you connect. In most cases, you are allowing the dapp to access your public key and view your wallet balances and activity.
Token Allowance: This permission allows the dapp to interact with your tokens to complete a buy or a trade.
Access requests are often unlimited, and it is important to always understand what permissions you are granting and ensure you only interact with trusted dapps.
It is recommended to regularly review your dapp permissions and token allowances and revoke access if:
A security vulnerability has been exposed
You don’t plan on using that dapp anytime soon
You no longer trust the dapp or its smart contract
You did not intend to connect to that dapp
Learn how to disconnect a dapp and revoke token permissions here.